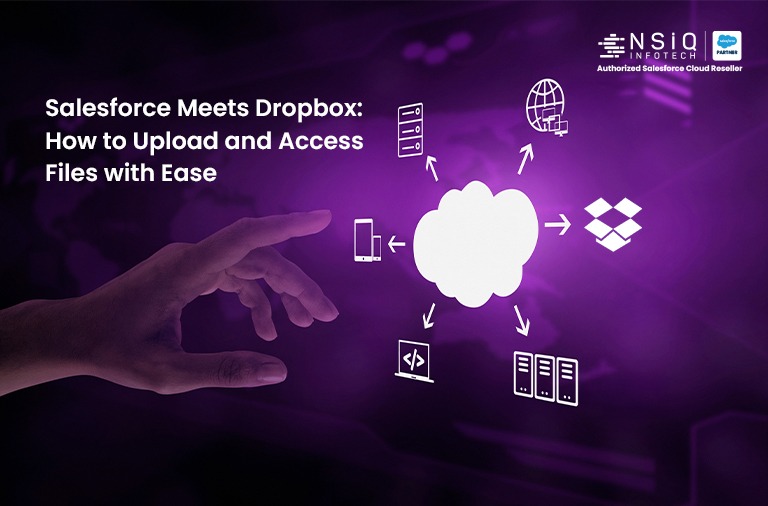
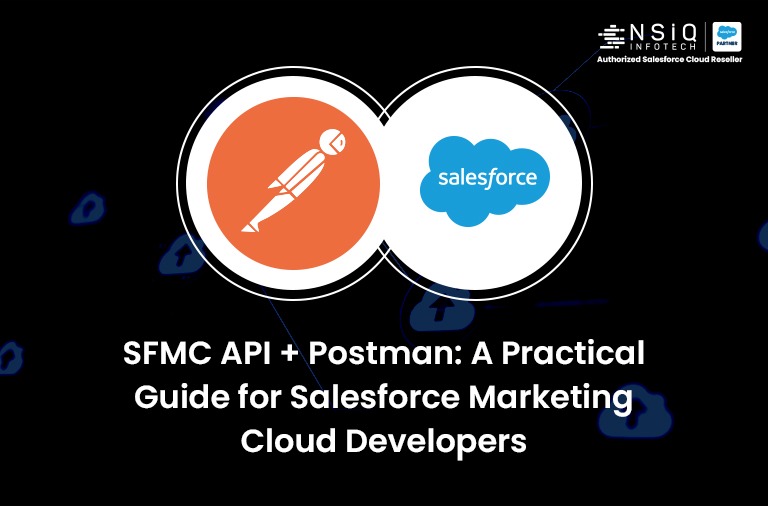
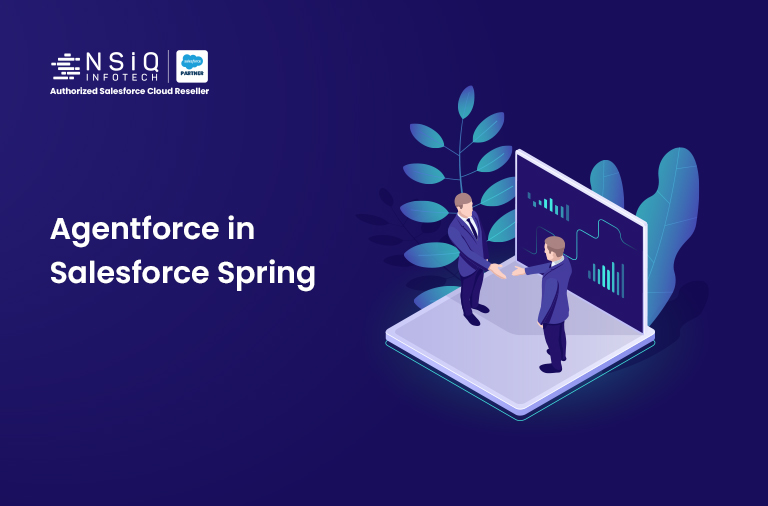
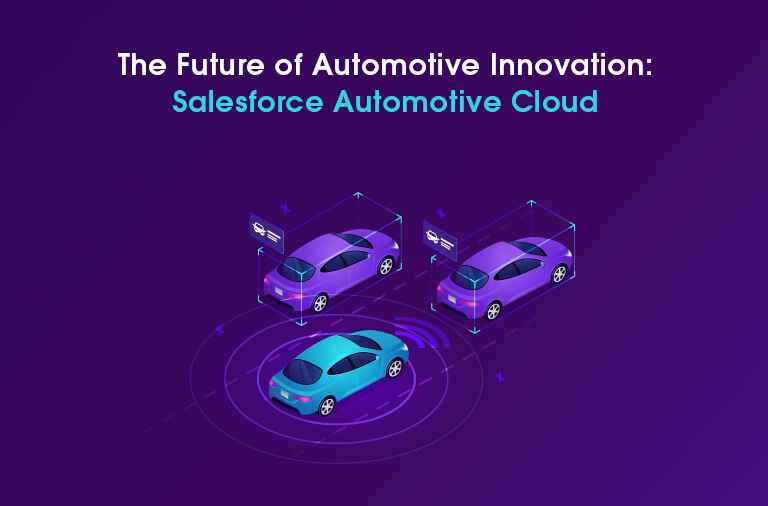
How to Integrate Slack with Salesforce: A Guide to Streamlining Your Business Processes

Collaboration tools have become essential in today’s workplace. Slack and Salesforce are two of the most popular tools used by businesses. Integrating Slack with Salesforce can improve communication, streamline workflows, and increase productivity.

Why Integrate Slack with Salesforce?

Integrating Slack with Salesforce offers many benefits, such as:

Improved Communication:

Sales reps can receive real-time updates on leads and opportunities in Slack. They can also communicate with their team members directly in Slack, without having to switch between different tools.

Streamlined Workflows:

Support teams can create cases and assign them to team members directly from Slack. This reduces the time it takes to create a case and ensures that the case is assigned to the right team member.

Increased Productivity:

A salesforce integration service consultant in USA suggests Integrating Slack with Salesforce as it eliminates the need for manual data entry, which can be time-consuming and prone to errors. This allows teams to focus on more important tasks.
Requirement: My requirement is to create a new event for an account in Salesforce when a new message is generated in a Slack channel with the same name as the account record. To do this, I will need to integrate Slack with Salesforce.
Solution: In my requirement, I will create an Apex class that is triggered at specific intervals, such as every hour or half hour. When the class runs, it should fetch all new messages in a Slack channel that arrived during that particular interval.

  1. The first step in the integration process is to create a new app in Slack. To do this, visit https://api.slack.com/apps and create a new app. Slack will provide you with a Client ID and Client Secret Key, which you will need in the further steps of the integration process.

app credentials
In addition, you will need to set the appropriate scope for the app in the OAuth & Permissions section of the app settings. This will ensure that the app has the necessary permissions to access and modify the data in your Slack workspace and Salesforce org.
Bot Token Scopes

  1. channels:history
  2. channels:read
  3. cconnect:read
  4. groups:history
  5. groups:read
  6. im:history
  7. im:read
  8. mpim:history
  9. mpim:read

User Token Scopes

  1. channels:history
  2. channels:read
  3. groups:history
  4. groups:read
  5. im:history
  6. im:read
  7. mpim:history
  8. mpim:read

This slack app also provides you with a User OAuth Token which will be used in further steps.
user oauth token
The first step is to obtain all channel IDs from Slack because we want the message to arrive in any Slack channel that is used in Salesforce.
To do this, we need to use the SLACK_API_TOKEN variable, which is the Slack API token that you obtain from the Slack app. We can make HTTP requests to obtain all channel IDs from Slack.
Http http = new Http();
HttpRequest req = new HttpRequest();
req.setMethod(‘GET’);
req.setEndpoint(‘https://slack.com/api/conversations.list’);
req.setHeader(‘Authorization’, ‘Bearer ‘ + SLACK_API_TOKEN);
req.setHeader(‘Content-Type’, ‘application/json’);
HTTPResponse res = http.send(req);
Map<String, Object> responseMap = (Map<String, Object>) JSON.deserializeUntyped(res.getBody());
Listchannels = (List) responseMap.get(‘channels’);We can use a list to store all the channel IDs from Slack.Next, we need to write Apex code to store this Slack channel data from an account object or any other custom object.After obtaining the channel IDs, we need to get the channel names from Slack. To do this, we need to make an HTTP callout to get the Slack channel names.Map<String, Object> infoParams = new Map<String, Object> {‘channel’ => channelId,’token’ => apiToken};Http http = new Http();HttpRequest infoRequest = new HttpRequest();infoRequest.setEndpoint(‘https://slack.com/api/conversations.info’);infoRequest.setMethod(‘GET’);infoRequest.setHeader(‘Authorization’, ‘Bearer ‘ + SLACK_API_TOKEN );infoRequest.setTimeout(60000);String infoBody = ”;for (String key : infoParams.keySet()) {if (infoBody.length() > 0) {infoBody += ‘&’;}infoBody += key + ‘=’ + String.valueOf(infoParams.get(key));}infoRequest.setBody(infoBody);HttpResponse infoResponse = http.send(infoRequest);string channelName;Map<String, Object> infoData = (Map<String, Object>) JSON.deserializeUntyped(infoResponse.getBody());Map<String, Object> channel = (Map<String, Object>) infoData.get(‘channel’);channelName = (String) channel.get(‘name’);As a prominent salesforce consultant in USA, we schedule our Apex class to run every half hour so that the below code can get any new messages that arrive in any Slack channel. You need to call the below code for each Slack channel you want to monitor.Datetime currentTime = Datetime.now();Datetime fiveMinutesAgo = currentTime.addMinutes(-30);String fiveMinutesAgoTimestamp = String.valueOf(fiveMinutesAgo.getTime()/1000);String channelMessages = ”;Map<String, Object> historyParams = new Map<String, Object> {‘channel’ => channelId, // Pass Your slack channel Id’limit’ => 1000,’inclusive’ => true,’token’ => apiToken,’oldest’ => fiveMinutesAgoTimestamp};Http http = new Http();HttpRequest historyRequest = new HttpRequest();historyRequest.setEndpoint(‘https://slack.com/api/conversations.history’);historyRequest.setMethod(‘GET’);historyRequest.setHeader(‘Authorization’, ‘Bearer ‘ + SLACK_API_TOKEN );historyRequest.setTimeout(60000);String historyBody = ”;for (String key : historyParams.keySet()) {if (historyBody.length() > 0) {historyBody += ‘&’;}historyBody += key + ‘=’ + String.valueOf(historyParams.get(key));}     historyRequest.setBody(historyBody);HttpResponse historyResponse = http.send(historyRequest);Map<String, Object> historyData = (Map<String, Object>) JSON.deserializeUntyped(historyResponse.getBody());Listmessages = (List) historyData.get(‘messages’);
String channelMessages;
for (Object message : messages) {
Map<String, Object> messageData = (Map<String, Object>) message;
channelMessages = channelMessages + ‘-‘ +(String) messageData.get(‘text’);
}
You now need to update the account object record with the same name as the Slack channel and utilise its field to create event data based on the Slack channel message

Salesforce AppExchange Security Review

What is salesforce security?

The Salesforce Security model assists you in protecting information at various levels, from an org level down to a personal record. The Organization, Objects, Records, and Fields are the logical tiers of security. While using the model allows users to safeguard the organization’s information at four layers.

We will cover how to enforce data security and how to prevent SOQL injection attacks in Apex. We’ll also review what Locker Service does for you and security best practices for LWC. We will also cover some security in Salesforce interview questions for the apex.

Why does salesforce security need in your code?

The Salesforce Security Features Developed by a Salesforce Application Development Company Can Assist You in Empowering Your Users To Do Their Jobs Safely And Efficiently. Salesforce Limits The Exposure Of Data To The Users.

User Mode vs System Mode

System mode means running apex code by ignoring the user’s permissions. like Apex Classes, Apex Triggers, and Apex Services.
User mode means running apex code by respecting the user’s permissions and sharing of records. Let’s understand it in more detail.

List of Component  for applying salesforce security in below

  • Apex class Security
  • Application Security
  • Lightning Web Component Security
  • Visualforce page Security

Security in apex class 

Enforcing Object & FLS Permissions in Apex
Apex doesn’t enforce object-level and field-level permissions by default. Let’s see how we can enforce the CRUD & FLS in Apex.

Read data (SOQL) Modify data (DML)
Schema methods Yes Yes
WITH SECURITY_ENFORCED Yes No
Security.stripInaccessible() Yes Yes
Database operations in user mode (pilot) Yes Yes

Schema Methods
You can also enforce object-level and field-level permissions in your code by explicitly calling the sObject to describe result methods.

CRUD

You can call the isAccessibleisCreateable, or isUpdateable methods of Schema.DescribeSObject -Result to verify whether the current user has read, create, or update access to an sObject.

  • Schema.sObjectType.Account.isAccessible() – before querying

For example :

  • Schema.sObjectType.Account.isCreateable() – before inserting

For example :

  • Schema.sObjectType.Account.isUpdateable() – before updating

For example :

  • Schema.sObjectType.Account.isDeletable() – before deleting

For example :

Field Level Security

You can use the below method to check field-level security before querying.

  • Schema.sObjectType.Contact.fields.Status__c.isAccessible()
  • Schema.sObjectType.Contact.fields.Status__c.isCreateable()
  • Schema.sObjectType.Contact.fields.Status__c.isUpdateable()

For example:   

WITH SECURITY_ENFORCED

Use the WITH SECURITY_ENFORCED clause to enable field- and object-level security permissions checking for SOQL SELECT queries in Apex code.
It Checks for both CURF & FLS.
For example:

Security.stripInaccessible()

Use the stripInaccessible method to enforce field- and object-level data protection. This method can be used to strip the fields and relationship fields from query and subquery results that the user can’t access. The method can also be used to remove inaccessible sObject fields before DML operations to avoid exceptions and to sanitize sObjects that have been deserialized from an untrusted source
The Id field is never stripped
SObjectAccessDecision securityDecision = Security.stripInaccessible(AccessType, sourceRecords);
Contact ctc = securityDecision.getRecords()[0]; System.debug(CTC.isSet(‘social_security_number__c’)); // prints “false”

User mode database operations (Pilot)

CRUD, FLS and sharing New parameter on:

  1. Database.query methods
  2. Search.query methods
  3. Database DML methods (insert, update, upsert, delete)

Apex generally runs in system context meaning current user’s permissions and field-level security take place during code execution. Our Apex code should not expose the sensitive data to the User which is hidden via security and sharing settings. Hence, Apex security and enforcing the sharing rule is most important. Let’s see how we can enforce the sharing in Apex.

Not related to CRUD or FLS!!!!

Sharing Enforced
With sharing Yes
Without sharing No
Inherited  sharing Inherit from parent, with sharing if entry point
No sharing clause Inherited from parent,
Without sharing if entry point except for lightning

With Sharing Keyword

If you use this keyword, then the Apex code will enforce the Sharing settings of the current user to Apex code. This does not enforce the Profile permission, only the data level sharing settings.
For example:

Without Sharing Keyword

Class declared with this keyword executes in System mode.
For example :

Enforcing the current user’s sharing rules can impact:

  • SOQL and SOSL queries. A query may return fewer rows than it would operate in system context.
  • DML operations. An operation may fail because the current user doesn’t have the correct permissions

Bulkify Apex Code

The very first principle is to write code for more than one record at a time. We should write scalable code and avoid hitting the governor. Let’s understand with an example. In the code below we are using a hard Coded Index[0]. Means code will only work on single record
Solution
In the above Trigger, the code explicitly accesses only the first record in the trigger.new collection by using the syntax Trigger.New[0]. Instead, the trigger should properly handle the entire collection of Accounts using Trigger.new collection.
For example :
Trigger AccountTrigger on Account(before insert){
for(Account acc: trigger.New){
if(acc.Name != null){
// DO something
}
}
}

Avoid SOQL & DML inside for Loop

Do not place SOQL or DML(insert/update/delete/undelete) statements inside a loop. When these operations are placed inside a for loop, database operations are invoked once per iteration of the loop making it very easy.
For example:
Map<Id, Account> accountMap=new Map<id, Account>([select id,name, (select id from contacts) from account where id in:trigger.newmap.keyset()]);
for(Account acc: accountMap.values()){
for(Contact con:acc.Contacts){
}
}

Use of the Limits Apex Methods

Use Apex Limits Methods to Avoid Hitting SF Governor Limits. Many of us are facing governor limit errors in trigger/classes/test classes. Few of the governor limit errors as follow:-

  1. Too many SOQL queries: 101
  2. Dml rows 10001
  3. Too many query rows 50001.

For example:

Now, using the above Limit methods we can check how many SOQL queries we can issue in the current Apex Context

If(Limits.getLimitQueries() – Limits.getQueries()>0) {
// Execute SOQL Query here.
}

Exception Handling in Apex Code

DML statements return run-time exceptions if something went wrong in the database during the execution of the DML operations. Don’t forget to use Try catch blocks for exception handling. With Apex, you can write code that responds to specific exceptions.
For example:

System.runAs()

Only for Test Mode
Enforces sharing, not CRUD or FLS
For example: 
@isTest
private class TestRunAs {
public static testMethod void testRunAs() {
// Setup test data
// Create a unique UserName
String uniqueUserName = ‘standarduser’ + DateTime.now().getTime() + ‘@testorg.com’;
// This code runs as the system user
Profile p = [SELECT Id FROM Profile WHERE Name=’Standard User’];
User u = new User(
Alias = ‘standt’,
Email=’standarduser@testorg.com’,
EmailEncodingKey=’UTF-8′,
LastName=’Testing’,
LanguageLocaleKey=’en_US’,
LocaleSidKey=’en_US’,
ProfileId = p.Id,
TimeZoneSidKey=’America/Los_Angeles’,
UserName=uniqueUserName
);
System.runAs(u) {
// The following code runs as user ‘u’
System.debug(‘Current         User: ‘ + UserInfo.getUserName());
System.debug(‘Current Profile: ‘ +                 UserInfo.getProfileId());
}
}

Application Security

When queries are built directly with user data inlined or query text, instead of using type-safe bind parameters, malicious input may be able to change the structure of the query to bypass or change application logic. This is called a SOQL injection attack.
Preventing SOQL Injection
There is the following way available in Salesforce to prevent SOQL Injections.

  • Use static queries
  • If need to use dynamic queries, always bind user input with “:”
  • If not possible, escape typecast or whitelist inputs

Using static SOQL:

Account[] accts = [SELECT Name, Phone FROM Account];

If need to use dynamic queries, always bind user input with “:”

public static List getAccount(String searchValue) {
String likeValue = ‘%’ + searchValue + ‘%’;
return (List) Database.query(
‘SELECT Name FROM Account WHERE Name LIKE :likeValue’
);
}

Escape Single Quotes / Typecasting

If not possible, escape typecast or whitelist inputs

Escape Single Quotes:

Typecasting like below:

  • Reflected XSS → app echoes malicious script from user input
  • Stored XSS → app returns malicious script from database
  • DOM XSS → reflected XSS but just on the browser

Locker Service

  1. JavaScript Strict mode enforcement
  2. DOM access containment → Safe Harbour: mechanism to relax this restriction
  3. Secure wrappers → sfdc.co/locker-api-viewer
  4. CSP → sfdc.co/locker-csp

Security in LWC

LWC Base Components enforce CRUD, FLS, and Sharing

  • lightning-record-form
  • lightning-record-edit-form
  • Lightning-record-view-form

LDS Wire adapters and functions enforce CRUD, FLS, and Sharing If calling Apex → apply the techniques just seen!

Enable Lightning web security in your Org.

  • From Setup, in the Quick Find box, enter Session, and then select Session Settings.
  • On the Session Settings page, select Use Lightning Web Security for Lightning web components and save.
  • Clear your browser cache after enabling or disabling Lightning Web Security to ensure the correct files are loaded in the browser. If you suspect that the correct security architecture is not in effect.

Load Assets Correctly

To import a third-party JavaScript or CSS library, use the platformResourceLoader module.

  • Download the JavaScript or CSS files from the third-party library’s site.
  • Upload the library to your Salesforce organization as a static resource, which is a Lightning security requirement.
  • In a component’s JavaScript file:
  • Import the static resource.

import myResourceName from ‘@salesforce/resourceUrl/myResourceName’;

  • Import methods from

import { loadStyle, loadScript } from ‘lightning/platformResourceLoader’;
Using the Lightning Platform resource loader guarantees your scripts always load in the correct order, are not duplicated, and load only when all dependencies have already loaded.
If the Lightning Platform resource loader is not used, it is possible that you or your customers may encounter page-breaking bugs as a result of a duplicated or improperly loaded script.

Visualforce page security

When does the Platform stop respecting FLS?
When you assign from a sObject to a primitive!

Apex: 

Random_Sensitive_Object_1__c r;
wRandom_Sensitive_Object_1 wR;
wR.Sensitive_Number = r.Sensitive_Number__c;

Visualforce:


We showed you how to respect FLS read permissions in Apex. Which one of the following would allow you to respect the FLS read permission in Visualforce?
Solution: 

  • Rendered=”{!$ObjectType.CustomObject__c.fields.CustomField__c.isAccessible}”
  • Rendered=”{!$ObjectType.CustomObject__c.CustomField__c.isAccessible()}”
  • Rendered=”{!$ObjectType.CustomObject__c.fields.CustomField__c.Accessible}”
  • Rendered=”{!$ObjectType.CustomObject__c.CustomField__c}”

Queueable Apex Class with Examples in Salesforce

1. What is Queueable Apex?

Queueable is one of the four Asynchronous Apex Methods used by a Salesforce Consultant in USA for submiting jobs for Async Processing it’s Similar to future Methods.

2. Future vs Queueable

–> Future Support only Primitive Data Types vs Queueable Support Primitive and non-Primitive Data Types.
–> We can’t monitor the jobs in Future vs Queueable monitor job depends on job Id.
–> We can’t call one future to another Future or batch apex. In the Queueable we can call one Queueable to another.
–> Future method does not return job id vs queueable returns Job id.
–> In the Future method You need to specify annotation to identify the Future method in Queueable you do not need to specify any specific annotation for identification.

3. Limitation of Queueable

  1. In the Queueable we can only one job can schedule at a time.
  2. Queueable can’t handle millions of Records at one Job.

4. Benifits of Queueable

1. Queueable support non-Primitive data types like Sobject Ex- Account, Contact, Or Custom Object as well.
2. If we want to chain one job to another job at that time, we can use Queueable.
3. If we want a job id, we will get using queueable, and using a job Id you can easily track the job.

5. Syntax Queueable

Implementation queueable Interface-
public class SampleClass implements Queueable {
public void execute (QueueableContext Qx){
// Here we Writing Code
}
}
queueable Interface:-  queueable Interface is the enhanced way of running asynchronous apex code
comparing to future async.

6. Steps Implementation

Following the below example, we are creating an Account record and also, we tracking jobs
Basically, two ways to track job Id: –

  1. UI Level
  2. SOQL Level

Below the Example we are creating a class QueueableDemo implements Queueable Interface
public class QueueableDemo implements Queueable{
public void execute(QueueableContext Qx){
system.debug(‘Here The execute method of QueueableDemo class’);
Account account = new Account();
account.Name = ‘Test Account’;
insert account;
system.debug(‘Account record inserted Here—->’+account.Name);
}
}

6.1 Tracking jobs Id from Apex jobs steps

Click on the Gear Setting Button select Set-Up-> Click the quick find box and Search Apex Jobs ->
Here you will get a list of job IDs and with help of a particular job Id you can easily track the job
Queueable

6.2 Tracking Job Id Help Of SOQL

Click below Query Editor tab -> Enter Here Soql -> Click to Execute
You will get all details here, as You Enter in the query
Query Example-
SELECT Id, Status, JobItemsProcessed, NumberOfErrors FROM AsyncApexJob where Id =                                ‘7075g00005dtaQg’.–>ExQueueable

Chaining Job in Queueable

Chaining a job is kind of chaining the job from one to another. Basically, chaining a job means running job after
Some other processing is completed first by another job.
In the below example, we changing jobs and also show the logs Similarly here three queueable class
QueueableDemo, QueueableDemoFirst, and QueueableDemoSecond are implemented by Queueable.

1. QueueableDemo

public class QueueableDemo implements Queueable{
public void execute(QueueableContext Qx){
system.debug(‘Here The execute method of QueueableDemo class’);
Account account = new Account();
account.Name = ‘Test Account’;
insert account;
system.debug(‘Account record inserted Here—->’+account.Name);
Id jobId = system.enqueueJob(new QueueableDemoFirst());
system.debug(‘QueueableDemoFirst job id is—->’+jobId);
}
}
Execute the below code in an anonymous window–>
Id jobId = system.enqueueJob(new QueueableDemo());
system.debug(‘QueueableDemo job id is–>’+jobId);

2. QueueableDemoFirst

public class QueueableDemoFirst implements Queueable{
public void execute(QueueableContext Qx){
system.debug(‘Here The execute method of QueueableDemoFirst class’);
Contact contact = new Contact();
contact.LastName = ‘Test Contact’;
insert contact;
system.debug(‘Contact Record Inserted Here —->’+contact.LastName);
Id jobId = system.enqueueJob(new QueueableDemoSecond());
system.debug(‘QueueableDemoSecond job id is—->’+jobId);
}
}

3. QueueableDemoSecond

public class QueueableDemoSecond implements Queueable{
public void execute(QueueableContext Qx){
system.debug(‘Here The execute method of QueueableDemoSecond class’);
StudentDetail__c studentDetails = new StudentDetail__c();
studentDetails.StudentAddress__c = ‘Abc Street’;
insert studentDetails;
system.debug(‘StudentDetail Record Inserted Here—->’+     studentDetails.StudentAddress__c);
}
}
Queueable
Queueable
Queueable

Conclusion:- Queueable apex is the Asynchronously running in the background. All job is going to the queueForm and Jobs are running when the system resource is available. Also, we can monitor the job help of job id.

Conditional Directives in Lightning Web Component

Today we learn about the lwc:if, lwc:elseif, and lwc:else conditional directives that are introduced in the Spring-23 release and how they replace the if: true and if: false directives.

  • Conditional directives in LWC are widely used in salesforce lightning app development in USA, which allows you to conditionally render or hide an element based on the value of an expression. The three main conditional directives in LWC are lwc: if, lwc: elseif, and lwc: else

lwc:if and lwc:else directive: –

  • The lwc:if the directive is used to conditionally render an element based on the value of an expression. The expression can be any valid JavaScript expression that evaluates to a boolean value. If the expression is evaluated to be true, the element will be rendered otherwise, it will be hidden.
  • The lwc:else directive is used to render elements if none of the conditions specified in the lwc:if and lwc:elseif directives are true.
  • The syntax for the lwc:if and lwc:else directive is as follows:


lwc:elseif directive: –

  • The lwc:elseif directive is used to render elements if the condition specified in the lwc:if the directive is false, and a different condition is true.
  • The syntax for the lwc:elseif directive is as follows:


Example: – How to insert an account object record using a Conditional directives lwc:if, lwc:else, and lwc:elseif
HTML Code: –

These are some of the best practices to follow when using lwc:if, lwc:else, and lwc:elseif in Lwc: – 

  • You can use template variables in the expression for lwc:if. A template variable is a placeholder for a value that you can reference in your component’s HTML template.
  • Be mindful of the order of elements: The order of elements in the HTML template matters when using lwc:if and lwc:else. Make sure to place the lwc:else directive after all of the lwc:if directives to avoid unexpected results.

Conclusion: – lwc:if, lwc:elseif, and lwc:else directives give a more coherent and simple syntax than the legacy if:true and if:else directives, and it is recommended to use them in your new development project.

Zapier Custom Trigger Integration for Referral Reactor & Salesforce

In our previous blog on Dispatch-Salesforce integration, we demonstrated how to integrate Dispatch with Salesforce using Zapier. In this blog, we will discuss Zapier Custom Trigger Integration for Referral Reactor(Webhook) & Salesforce(REST API).

What is Referral Reactor ?

Referral Reactor is a referral management platform that allows businesses to track and manage their referral programs. A Salesforce Development Company in India uses Referral Reactor to easily track and manage referrals, set up and manage referral campaigns, and provide rewards to referral sources.

The platform integrates with a variety of other systems, including Salesforce, making it an attractive option for businesses looking to automate and streamline their referral processes.

INTRODUCTION : 

Today we will discuss how to integrate Referral Reactor with Salesforce using Zapier.

The integration of Referral Reactor and Salesforce using Zapier can be done in a few simple steps. Firstly, businesses need to set up a Zapier account and connect both Referral Reactor and Salesforce to it. Then, they can create a Zap that automatically transfers data from Referral Reactor to Salesforce or vice versa.

For example, we can set up a Zap that creates a new Lead record in Salesforce when a new referral is created in Referral Reactor.

1. First we create a connected app in salesforce.

A Connected App in Salesforce is used to integrate external applications with Salesforce. To get the URL, client ID, and client secret key, you will need to create a Connected App in Salesforce.

1.1 Go to your Salesforce account and click on the “Setup” button.

1.2 In the left-side menu, search for “App Manager” and click on it.

1.3 Click on the “New Connected App” button.

1.4 Fill in the required information for the Connected App, such as name, contact email, and API name.

1.5 Under “API (Enable OAuth Settings)”, check the “Enable OAuth Settings” checkbox and enter a callback URL.

1.6 Click on the “Save” button.

1.7 Once the Connected App has been created, you can find the “Client ID” and “Client Secret” in the “Consumer Key” and “Consumer Secret” sections.

1.8 The URL can be found in the “Callback URL” section, which you entered in step 1.5.

2. Now we move to zapier.

Now first we create a “zap” in Zapier

1. Catch Raw Hook in webhooks by Zapier.

First, we understand how this action works in Zapier.

  • Catch Hook is a feature in Zapier that allows you to capture data from a webhook and use it as a trigger for your Zap. A webhook is a mechanism that allows you to send data from one application to another over the internet.
  • When you create a Catch Hook, Zapier provides you with a unique URL. You can send data to this URL from another application, and Zapier will automatically capture that data and use it as the trigger for your Zap.

2. POST in webhooks by Zapier.

How does this step work?

The “POST” action in a Webhook by Zapier is a type of HTTP request method used to send data to a server. In the context of Zapier, a POST request can be used to create a new record or update an existing record in an external application through a Zap. The POST action is typically used in the “Action” step of a Zap, and it requires a URL endpoint to be specified, along with any required headers and payload data that needs to be sent with the request. The response from the server can be used to trigger additional steps in the Zap or to pass data back to Salesforce or another app in the Zap.

In this step, when writing the URL, include the client ID and client secret obtained from the connected app inside.

3. Custom Request in Webhooks by Zapier.

What is the use of this step?

The Custom Request action in Webhook by Zapier allows you to make a custom HTTP request to an API. This action allows you to send data from Zapier to an external service or receive data from an external service to be used in a Zap. The Custom Request action can be used for a variety of purposes such as updating a database, creating a new entry, or retrieving data. It supports various HTTP methods such as GET, POST, PUT, PATCH, and DELETE. Additionally, it allows you to specify custom headers and payloads, giving you complete control over the format of the request being sent. The Custom Request action is a powerful tool that can be used to integrate Zapier with a wide range of APIs.

Here we use POST action.

The POST action in Zapier’s Webhook by Zapier action allows you to send data to a specified URL using the HTTP POST method. This is useful for triggering an action in another system or sending data to a third-party API. To use the POST action, you first need to specify the URL where you want to send the data. Then, you can configure the data that you want to send using the Body field. The Body field allows you to specify a JSON payload or other data format that will be sent in the body of the HTTP POST request. You can also use variables from previous steps in your Zap to dynamically generate the data that is sent. Once the Zap is triggered and the POST action runs, the data will be sent to the specified URL and can be used to trigger an action or update information in another system.

In this step, in the data variable of the Zap, select ‘Raw body’ obtained from the first step and add ‘Authorization’ with the value ‘Bearer [access token obtained from the second step of the Zap]’. The URL should be the base URL followed by ‘/services/apex/rest/contact’, which will call the Apex class annotated with ‘@RestResource(urlMapping=’/contact/*’)’. This data will be passed to the Apex class, where a new Lead record will be inserted in Salesforce using the information provided.

This is the Apex class used to create a Lead record.

@RestResource(urlMapping='/contact/*')
global without sharing class referralreactor {
    @HttpPost
    global static string createContact() {
        Contact con= new Contact();
        RestRequest req = RestContext.request;
        String body = '';
        body = (String)JSON.deserializeUntyped(RestContext.request.requestBody.toString());
        ReferralJSON2Apex listLoc = (ReferralJSON2Apex)JSON.deserialize(body, ReferralJSON2Apex.class);
        RestResponse res = RestContext.response;
        if(listLoc.data.account != null && listLoc.data.account != ''){
            List accountList = new List();
            accountList = [SELECT Id FROM Account WHERE Id =: listLoc.data.account OR Referral_Account_Id__c =: listLoc.data.account];
            try{
                List newLeadList = new List(); 
                List newContactList = new List();
                List existingContactList = [SELECT Id FROM Contact WHERE Name =: listLoc.data.name];
                if(!existingContactList.isEmpty()){
                }else {
                    List customerActList = [SELECT Id FROM Account WHERE Name =: 'Customer' LIMIT 1];
                    Lead leadRecord = new Lead(FirstName = listLoc.data.name.split(' ')[0],
                                               LastName = listLoc.data.name.split(' ')[1],
                                               Phone = listLoc.data.phone,  State = 'TX', City = 'N/A',  Country = 'United States',Street = 'N/A', PostalCode = 'N/A');
                    newLeadList.add(leadRecord);
                }
                if(!newLeadList.isEmpty()){
                    insert newLeadList;
                }
                List newRefContactList = new List();
                List newRefLeadList = new List();
                List existingRefContactList = [SELECT Id FROM Contact WHERE Name =: listLoc.data.referringUserName];             
                if(!existingRefContactList.isEmpty()){
                } else {
                    Lead leadRecord = new Lead(FirstName = listLoc.data.name.split(' ')[0],
                                               LastName = listLoc.data.name.split(' ')[1],
                                               Phone = listLoc.data.phone, State = 'TX',     City = 'N/A',  Country = 'United States',Street = 'N/A', PostalCode = 'N/A');
                    newRefLeadList.add(leadRecord);
                    if(!newRefLeadList.isEmpty()){
                        insert newRefLeadList;
                    }
                    return 'Success';
                } 
            }
            catch (Exception e) {
                return e.getMessage() + e.getLineNumber();
            }
        }else {
            return 'Please Provide Account Details !';
        }
        return '';
    }
}

CONCLUSION :

In this blog, we discussed the steps to integrate Referral Reactor with Salesforce using Zapier. We explained the process of creating a Connected App in Salesforce to obtain the necessary URL, client ID, and client secret key. Then, we walked through the steps of creating a “zap” in Zapier, including setting up a Catch Hook, making a POST request, and using a Custom Request in the Webhooks by Zapier action. By following these steps, businesses can automate the transfer of data between Referral Reactor and Salesforce, streamlining their referral processes. With this integration, businesses can efficiently track and manage their referral programs, set up referral campaigns, and provide rewards to referral sources.

Integration of Dispatch.me and Salesforce using Zapier

INTRODUCTION :

In today’s fast-paced business world, it’s essential to automate and streamline as many tasks as possible. This is where Zapier comes in. Zapier is an online automation tool that enables you to integrate multiple apps and automate workflows, making it an incredibly valuable tool for businesses and individuals alike.

INTEGRATIONS :

Zapier integrates with over 2,000 apps, so you can easily connect the tools you use every day. Whether you need to automate tasks in your CRM, email, project management, or another app, Zapier has you covered. As a reliable salesforce consulting company in India, we easily create Zaps that automate repetitive tasks so that you can focus on more important tasks.

EXAMPLE :

We have a scenario in which we want to integrate Dispatch with Salesforce. To achieve this, we will create Zaps within Zapier. Dispatch has various jobs and we use Salesforce object records to create new jobs in Dispatch. Now, when a job record is completed within Dispatch, we want the corresponding Salesforce object record to be updated in Salesforce.

1. Open the dispatch application.
2. We aim to complete a job record in dispatch and then update the relevant salesforce object record accordingly.

3. This is a Salesforce object record. Using this record, our job was created in Dispatch.

In our case, we will create jobs using three Salesforce objects: Opportunity, Content, and Reconstruction. We have also created an external ID field in all three of these objects and populated it with the job ID. (We have already created a separate Zap to populate the job ID in this external field in all of these objects.)

4.  Now, we will create a Zap in Zapier that will help us update the above-mentioned Salesforce record when the desired job is completed in Dispatch.

4.1 The first step in our Zap is to capture the job in Dispatch. To do this, we must select the New Trigger Event in Zapier, which is named ‘New Event in Dispatch.’

When you attempt to retrieve data from Dispatch, Zapier will provide a webhook URL. You simply need to provide this webhook URL to support activating it for use with Dispatch.

4.2 The next step is to locate the relevant record in Salesforce. Steps 2, 3, and 4 will involve finding the record in all three corresponding Salesforce objects.

4.3 The fifth step in our Zap is to update the corresponding Salesforce object. When the job is completed in Dispatch, Dispatch will send a response to Zapier, and using this response, we will update certain fields in the Salesforce object. To do this, we will create a “Path” element within this step.

4.4 Within the Path, we will check which object record contains the completed job ID. Once we have found the object, then the next step is to update the Salesforce record.

5. To complete the job in Dispatch, please click the ‘COMPLETE’ button next to the job name.

6. When the job is completed, our Zap will run. If the Zap’s status is ‘success’, then the Salesforce record will be successfully updated. In this case, we will update the description field in the Salesforce object.

7.  Hurray! The record has been successfully updated.

CONCLUSION :

In conclusion, the steps to integrate Dispatch and Salesforce using Zapier have been outlined. The process involves creating Zaps in Zapier and using Salesforce objects to create new jobs in Dispatch. When a job is completed in Dispatch, a response is sent to Zapier which updates a corresponding Salesforce object record. The process is completed by clicking the “COMPLETE” button in Dispatch, triggering the Zap to run, and updating the Salesforce record with success. This results in a successful update of the Salesforce record, allowing for seamless integration between Dispatch and Salesforce.

DocuSign eSignature Integration with Salesforce Lightning Flow

DocuSign is a company based in San Francisco, California that is considered by many to be the industry leader in electronic signature (e-signatures) technology. DocuSign’s software allows parties to sign contracts and other documents electronically rather than signing them with pen and paper. As a salesforce consultant in India, we use DocuSign to to sign contracts and other documents electronically. This eliminates the need for parties signing a contract to be physically present at the same location. The technology also provides important security protocols. Signed documents are uploaded and encrypted with a unique hash. The hash can later be compared to a document to ensure that no one has tampered with the contract or other uploaded document.

How to use DocuSign in flow with a custom button?

First of all, go to AppExchange and search for the DocuSign App.


Download and install it for all user

  1. DocuSign Configuration
    1. : Go to the app through the Nine dots icon or App launcher and search for DocuSign App Launcher and Select It.

    2. After selecting DocuSign, we will be able to see a Window like the below-given image and click “Sign up for free “.

    3. : After clicking on “Sign up for free”, the DocuSign Registration page will open, insert the correct information as per the requirement.
    4. After completing all steps a screen like the below given image is visible in the DocuSign Setup Tab.
    5. Go to ‘DocuSign Envelope Templates’ and upload the document which is needed to send for signature and click on the ‘Upload’ button.
    6. After uploading the document it will move to the next wizard for Recipients. There we need to Add Recipients to send Emails.
    7. After adding Recipients it will move to the next step Merge fields. So, Add Merge Field to set the salesforce field in the document if needed.

    8. In the ‘Place Fields’ step, we can customize the document just by dragging and drop of fields and signatures to the place we want.

    9. The ‘Options’ step will configure the templated by giving several options like Reminders that remind us to send emails on a particular date or time.
    10. In the ‘Custom Button’ step a button is created when we check the page layout checkbox, but in our scenario, a flow is called from the custom button so we can’t use the ‘Custom Button’ wizard. 


How to use DocuSign in the flow?

  1. First of all, create one class and Inviolable Method for calling flow action, the sample code is here.

    Code:-

    public class SendToReconstructions {
    @InvocableMethod
    public static List sendEnvelope(List record) {
    Reconstruction__c mySource = record.get(0);
    system.debug(‘mySource….’+mySource.Id);
    sendEnvelopeInFuture(mySource.Id);
    return Null;
    }

    @future(callout = true)
    public static void sendEnvelopeInFuture(Id mySourceId) {
    createAndSendEnvelope(mySourceId);
    }

    public static Id createAndSendEnvelope(Id mySourceId) {
    dfsle.Envelope myEnvelope = dfsle.EnvelopeService.getEmptyEnvelope(
    new dfsle.Entity(mySourceId)
    );

    Reconstruction__c rc = [SELECT id, contact__c FROM Reconstruction__c WHERE Id = :mySourceId LIMIT 1];

    Contact myContact = [SELECT Name, Email FROM Contact WHERE Id = :rc.contact__c LIMIT 1];

    dfsle.Tab mySignHereTab = new dfsle.SignHereTab()
    .withScale(1) // 1/2 scale
    .withRequired(true) // Signing is mandatory
    .withPosition(new dfsle.Tab.Position(
    1, // The document to use
    1, // Page number on the document
    500, // X position
    500, // Y position
    null, // Default width
    null)); // Default height

    // Create an anchor
    dfsle.Tab.Anchor myAnchor = new dfsle.Tab.Anchor(‘Acknowledgement’);

    // Create an Initial Here tab
    dfsle.Tab myInitialHereTab = new dfsle.InitialHereTab()
    .withRequired(false) // Signing optional
    .withAnchor(myAnchor);
    dfsle.Recipient myRecipient = dfsle.Recipient.fromSource(
    myContact.Name,
    myContact.Email,
    null,
    ‘Signer1’,
    new dfsle.Entity(rc.contact__c)
    )
    .withTabs(new List { // Associate the tabs with this recipient
    mySignHereTab,
    myInitialHereTab
    });
    myEnvelope = myEnvelope.withRecipients(new List { myRecipient });
    dfsle.UUID myTemplateId = dfsle.UUID.parse(‘438228d7-1c86-40c2-a37e-b7f855ee070d’);
    dfsle.Document myDocument = dfsle.Document.fromTemplate(
    myTemplateId,
    ‘Services Framework Agreement’ );
    myEnvelope = myEnvelope.withDocuments(
    new List { myDocument }
    );
    myEnvelope = dfsle.EnvelopeService.sendEnvelope(
    myEnvelope,
    true
    );
    return myEnvelope.Id;
    }
    }

  2. Now to create flow go to Setup > Flow > New Flow > Auto launched Flow. Get records from objects as per the need


  3. Create one Variable to store the record id, which gets from the custom button URL


  4. Add a new element Apex Action and select the inviolable method class name and set the input value and select the variable name which was created in step 3 and click ‘Done’.


  5. Click ‘save as’ and Active the flow. Now we need to create a custom button that is when the user clicks on the button, Auto launched Flow is called and it sends an email to the current record. So, go to object manager and select ‘Buttons, Links, And Actions’, and set property like the below image.

    /flow/sendEmailToReconstruction?reconstructionId={!Reconstruction__c.Id}&retURL={!Reconstruction__c.Id}


  6. Now ­­­go to the page layout and set the custom button


  7. Now custom button is visible on the record page.


How to create Lightning Web Component (LWC) in VS Code

Visual Studio Code is the best and ideal tool/ IDE for Salesforce development. It is a popular development tool for its incredible productivity features. As a salesforce development company in USA, we widely use visual studio in our projects. We’ll explore some useful VS Code extension for Salesforce and how to configure, and customize it to use as a powerful tool for Salesforce Development.
 Installation of Visual Studio Code:-
Step 1: Install Visual Studio Code
The installation of Visual Studio Code depends on the platform. Go to the official website of Microsoft to install the Visual Studio Code.
https://visualstudio.microsoft.com/downloads/
Here click on the Free Download button and choose your platform for installation.

Step 2: Install CLI

CLI stands for Command Line Interface. Salesforce CLI provides a lot of commands to make life easy.  It creates different environments for development, testing, individual org for teams, and merging the code in a single org using scratch org and version control.
Copy the link for the installation of CLI
https://developer.salesforce.com/tools/sfdxcli

Step 3: VS Code

After downloading open the Visual Studio Code, you will see something like these.

Step 4: Extensions

Now click on VIEW and then EXTENSIONS or just click on the symbol of Extensions shown in the image below.

Step 5: Install Extensions

Type  Salesforce Extension Pack in the search box and click install

This pack provides features for working with the development org (scratch org, sandboxes, and DE org), Apex, Aura components, and Visualforce.
This extension pack consists of 9 extensions which are as follows:-

  1. Salesforce CLI Integration: This extension interacts with Salesforce CLI to provide core functionality.
  2. Apex: This extension provided syntax highlighting and code completion for Apex.
  3. Aura Components: This extension enables you to work on Aura components.
  4. Visualforce: This extension enables you to work on Visualforce Pages and Components just through your IDE.
  5. Apex Interactive Debugger: This extension enables you to debug your apex code from your IDE.
  6. Lightning Web Components: This extension supports and uses the HTML language server from VS Code.
  7. Apex Replay Debugger: This extension replays the apex execution from a debug log reference and helps in debugging the error in the apex code.
  8. Salesforce Lightning Design System (SLDS) Validator:- This extension simplifies working with the Salesforce Lightning Design System (SLDS) and provides code completion, syntax highlighting, and validation with recommended tokens and utility classes.
  9. SOQL: This extension enables you to interactively build Salesforce Object Query Language(SOQL).

Step 6: Create a Project and connect with Org

  1. Click VIEW and then click Command Palette or else just press Ctrl+Shift+P
  2. Type -> SFDX: Create Project with Manifest and select Standard project.
  3. Enter the Project Name to create the folder and choose the location for the folder.
    As the folder has been created, we can see different files and folder which has been created through extensions.
  4. Connect the org:
    • Click VIEW and then click Command Palette or else just press Ctrl+Shift+P
    • Type -> SFDX: Authorize an Org, and select the required development org(project default, Production, Sandbox, Custom).
    • We selected Project Default, entered the Alias name, and choose the org to which we want to connect.
    • Now we can see the same Alias name at the end of the VS Code same as the image

Basic of Lightning Web Component:-

Lightning Web Component is the Salesforce implementation of that new breed of lightweight frameworks built on web standards.
Lightning Web Component is formed with the help of HTML, JavaScript, CSS(optional), and XML configuration files, which all define the metadata values for the component.

  • Naming Convention of File:
    • Must begin with a lowercase letter
    • Must contain only alphanumeric or underscore characters
    • Must be unique in the namespace
    • Can’t include whitespace
    • Can’t end with an underscore
    • Can’t contain a hyphen (dash)

Structure of Lightning Web Component:-

  • Create Lightning Web Component:
    • Click ‘VIEW’ and then click ‘Command Palette’ or else just press ‘Ctrl+Shift+P’.
    • Type ->SFDX: Create Lightning Web Component
    • Enter the file name as -> firstHelloLWC_Component
    • Choose ‘force-appmaindefault’ as a directory.
      It will create an LWC component.
      Our LWC component by default has 3 files: .html, .js, and meta.xml.
  • .html file:
    • .html file contains all the markups, normal HTML tags, lightning tags, as well as lightning component elements inside the tag.
    • Code:

      Hello, {greeting}!


  • .js file:
    • As LWC is using the core concept of web standards, and JavaScript is the main programming or scripting language to handle web applications. It defines business logic and event handling like On click of a button, on-page load, getting data from Salesforce object, etc.
    • Code:

      import { LightningElement } from ‘lwc’;
      export default class FirstHelloLWC_Component extends LightningElement {
          greeting = ‘World’;
          changeHandler(event){
        this.greeting = event.target.value;
          }
      }
  • .xml file
    • Each Lightning web component folder must include a configuration file named .js-meta. XML. The configuration file defines the metadata values for the component, including targets and the design configuration for the Lightning App Builder and Experience Builder.
    • We set to deploy components for different pages like the App page, Record page, etc.
    • Code:
      
      
      56.0
      true
      lightning__HomePage
      
  • Deploy LWC component to Org:
    • Right-click on the folder and select ‘SFDX: Deploy Source to Org’.
  • Add this component to the Lightning home page:
    • App launcher -> Sales -> Home tab -> Setup -> edit page > find ‘firstHelloLWC_Component’ in custom list > drag it to page > save > activate
    • Our ‘firstHelloLWC_Component’ component can be seen below in the image.

How to take help from ChatGPT for Salesforce Apex Code

  1. COMPLEX TEST CLASS BY CHATGPT:

       Problem Statement: “We were facing an issue in the test class (this test class follows the Apex Enterprise Patterns). We tried to cover the code coverage but somehow, we didn’t achieve test code coverage after that I got the idea of using ChatGPT.
So, we asked about the error that we were facing, it gave the sample code and I tried that code and it resolved the issue.”
        How we used ChatGPT: You can see the below screenshot.


            Conclusion: ChatGPT is really helpful even for complex scenario (if we could make it understand what we’re actually looking for) that is hard to find on google and directly provides answer to the problem statement (saving our time of toggling between blogs for finding the optimize solution).

  1. CUSTOM SOLUTION BY CHATGPT: 

       Problem Statement: “I was trying to get a specific word from a sentence (not substring). I first tried this with the flow but I haven’t found a way to achieve that, so, I searched on google, how to achieve this with the flow.
But it seems like google didn’t even understand my question and was showing results only related to fetching a substring from a string and not a single word from an entire sentence.
Finally, I went to ChatGPT for help and it straight-forward told me that it is not possible via Flow rather this can be achieved by writing custom code and showed me the below code.”
         How we used ChatGPT: You can see the below screenshot.

          You can use the below code.

          Conclusion: Using Chat GPT we resolved one more issue. Chat GPT gave the sample code, after which we optimized that code and resolve that issue. So again it is helpful.

Creating personalized customer journeys with Salesforce Marketing Cloud

The Marketing Cloud is one of the most popular Salesforce platforms, geared toward marketers that want to maximize their return on investment (ROI) by knowing customers and providing them with what they want. This blog will focus on the Marketing Cloud and its specifics.
The Marketing Cloud puts the customer at the centre of every interaction. The customer has a complete choice over what, when, where, and how a brand interacts with them. Managing that customer relationship using standard means becomes quite challenging. At that point, our Salesforce Marketing Cloud Services come into play.

Salesforce highlights the benefits of its Marketing Cloud platform as below:

A deep understanding of the consumer: Marketing Cloud allows you to connect data from many sources and devices to acquire a single unified view of the customer. You will also be able to acquire and activate data from third parties.
Artificial intelligence customization: Marketing Cloud can be integrated with the Einstein tool for limitless possibilities, allowing AI to coordinate interactions. As a result, the platform drives personalized consumer communications. Moreover, this Salesforce marketing platform maintains interest and awareness throughout the journey (a two-way real-time interaction), and recommends information to provide each consumer with the right action.
Impact analysis: Using artificial intelligence and the digital tool Google Analytics 360, the Marketing Cloud gets the ability to measure each customer’s journey across several channels and devices. The Marketing Cloud has services for both B2B (when the customer is another firm) and B2C (when the customer is a consumer). Unified data sources, channel customization, the capacity to interact at any point in the customer relationship, and campaign performance measurement are some of the significant benefits of the Salesforce Marketing Cloud Services.

Tools that make the Marketing Cloud exceptional

The Marketing Cloud from Salesforce enables the creation of personalized content for each consumer across any channel, including email, web or mobile advertising, e-commerce, and even social media or user communities.
In addition to being integrated into the Salesforce ecosystem, the Marketing Cloud comprises all of the following products:

  • Salesforce Journey Builder—creates personalized customer journeys across many channels.
  • Email Studio-assists in creating personalized email marketing campaigns.
  • Social Studio-designs personalized programs that convert our social media following into leads.
  • Mobile Studio-offers marketing engagements via SMS, push notifications, and group messaging, allowing us to leap mobile devices.
  • Audience Studio-collects data from any source and consolidates it into a single location. The Audience Studio creates appealing material for the audience by achieving the “social listening” goal. This covers digital advertising and assists in discovering the Salesforce solution for managing the acquisition, retargeting, and alignment efforts for your target audience.
  • Datorama- This is the central hub where data is monitored via a dashboard, helping the user demonstrate an understanding of how business growth can be boosted, keeping in mind several metrics such as ROI.
  • Interaction Studio– a tool for visualizing and connecting with customers in real-time through any interaction.
  • Data Studio-is an effective tool for discovering a company’s audience, acquiring data, and taking control of that data. This is an exceptional tool for increasing revenue through the use of important data.
  • Google Analytics 360- Marketing Cloud platform integrates this product from Google, allowing users to use all customer insights to better understand them and get more from marketing actions.
  • Pardot- designed for B2B companies, Pardot makes marketing automation easier for sales teams to use when closing deals and building valuable relationships.

You should utilize Marketing Cloud if your company:

  • Prefers transactional purchases and short sales cycles
  • Needs to assemble massive volumes of behavioural data from several sources
  • Wants to segment contacts based on different datasets that are not stored in your Salesforce organization’s primary database
  • Have an internal marketing team that is fairly tech-savvy

Wrapping up
The Marketing Cloud’s efficiency is outstanding when used as a complete studio suite. Also, you become unstoppable when you combine it with add-ons like SalesWings for Marketing Cloud (lead scoring, sales intelligence, alerts, and behavioral tracking). According to Salesforce data, organizations using Marketing Cloud saw a 43 percent improvement in marketing campaign ROI, a 44 percent increase in lead volume, and a 46 percent faster campaign deployment. These stats depict higher productivity and profitability levels. However, your marketing is unique, and not every studio will be a good fit for what you want to achieve. Therefore, we suggest you understand each Salesforce Marketing Cloud tool as a separate product. Examine where you want to focus your marketing efforts, assess your strengths and weaknesses, and utilize the knowledge in this blog to select Marketing Cloud Studios that will reach your clients through the preferred channel.